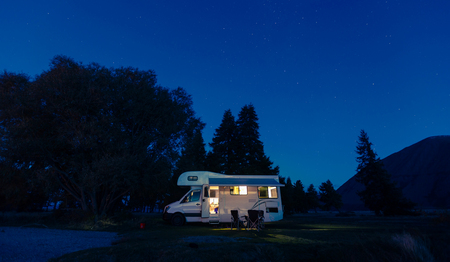
1. Getting Started with UK Campervan Electrics
Welcome to the first step in building your dream campervan adventure, right here in the UK! Understanding your campervan’s electrical system might feel a little daunting at first, but don’t worry—we’ll explore everything together in clear and simple terms. Before you even pick up a wire or tool, it’s crucial to know the essentials about how campervan electrics work, especially with unique UK laws and regulations in mind. In the UK, safety comes first, and there are strict guidelines designed to keep you and your family safe on every journey. You’ll need to understand what counts as a “roadworthy” electrical installation, including key rules from the DVLA and National Caravan Council, so your van is both legal and secure. From basic 12V systems for lights and USB chargers, to more advanced setups with solar panels or mains hook-up, every decision should be made with confidence. We’ll break down all the important safety basics—like circuit protection, earthing, and cable sizing—so you can travel with peace of mind. Ready to start your self-build journey? Let’s take the first step together towards creating a cosy, safe home-on-wheels that will take you anywhere across Britain.
Planning Your Campervan Electrical Layout
Before you pick up a single wire or fuse, it’s important to create a clear plan for your campervan’s electrical system. This stage is crucial for British self-builders, as it ensures your setup meets your travel needs, suits the UK climate, and handles our unique road conditions.
Assessing Your Power Needs
The first step is to figure out how much electricity you’ll require daily. Think about what you want to power—will you have a kettle for those all-important tea breaks, fairy lights for cosy evenings, or perhaps a heater for chilly British nights? Make a list of every appliance and gadget, then estimate how many hours each will run per day.
| Appliance | Wattage (W) | Hours/Day | Total Wh/Day |
|---|---|---|---|
| 12V Fridge | 40 | 24 | 960 |
| LED Lights | 10 | 5 | 50 |
| Laptop Charger | 60 | 2 | 120 |
| Kettle (brief use) | 1000 | 0.1 | 100 |
| Total Daily Usage (Wh) | 1,230 | ||
Mapping Out Components
Once you know your energy needs, sketch your electrical layout. Mark where you’ll place key components like leisure batteries, solar panels (if you fancy making the most of rare sunny days), the distribution board, sockets, and switches. Consider practicality: keep heavy batteries low and close to the van’s centre, and group appliances that are used together. Safety tip: keep cables tidy and away from damp spots!
Selecting Suitable Components for UK Conditions
The British climate can be unpredictable. Opt for components that can withstand dampness and fluctuating temperatures—look for IP-rated waterproof enclosures and robust wiring. If you plan winter getaways in Scotland or Wales, consider insulation around batteries and heating pads to maintain performance. Road conditions matter too; rugged roads call for secure mounting solutions so nothing shakes loose during countryside adventures.
Your Planning Checklist:
- Calculate total daily watt-hour usage.
- Create a scaled diagram of your van showing component locations.
- Select weatherproof and vibration-resistant materials.
- Factor in extra capacity for unexpected gadgets or future upgrades.
- Plan cable routes to avoid hazards and maximise safety.
This careful planning phase gives you peace of mind on the road, knowing your campervan’s electrical heart is ready for whatever the great British outdoors—and weather—might throw at you.
3. Choosing Batteries and Power Sources
When it comes to powering your self-build campervan in the UK, making the right choices for batteries and power sources is essential to ensure a safe, comfortable, and reliable adventure for the whole family. Let’s explore the common options you’ll encounter on your journey.
Batteries: The Heart of Your Electrical System
Your leisure battery acts as the heart of your campervan’s electrical system. In the UK, most vanlifers choose between three main types: lead-acid, AGM (Absorbed Glass Mat), and lithium batteries. Lead-acid batteries are cost-effective and widely available but can be heavy and require regular maintenance. AGM batteries offer better performance with less upkeep, making them a popular choice for families who want peace of mind on the road. Lithium batteries are the gold standard—lightweight, long-lasting, and efficient—but they do come with a higher price tag. For most UK adventures, AGM or lithium batteries strike a good balance between cost, durability, and safety.
Solar Panels: Harnessing Nature’s Energy
Solar panels are an excellent addition to any UK campervan, especially if you enjoy off-grid camping or want to reduce reliance on campsites. While British weather can be unpredictable, modern solar panels are surprisingly effective even on cloudy days. A roof-mounted solar setup paired with a suitable charge controller can keep your leisure battery topped up through spring showers or autumn mist—perfect for weekend getaways or longer family holidays.
Split Charge Relays: Charging While You Drive
A split charge relay allows your van’s alternator to safely charge your leisure battery as you drive without draining your starter battery. This is especially useful in the UK, where scenic drives between sites are part of the experience. It’s a straightforward solution that ensures you arrive at your destination ready for cosy nights and hot drinks inside your camper.
Mains Hookup: Plugging into Convenience
Many UK campsites offer 230V mains hookup points. Adding a mains hookup system to your van means you can use standard household appliances and keep everything charged during longer stays. It adds flexibility and peace of mind, particularly for families who appreciate those little home comforts after a day of exploring local countryside trails or seaside towns.
What Works Best for UK Adventures?
The best power setup depends on how you plan to use your campervan. For regular campsite stays, a combination of a quality leisure battery and mains hookup provides convenience and comfort. If you love exploring wilder parts of the UK or want more independence, consider pairing AGM or lithium batteries with solar panels and a split charge relay for truly flexible living on the road. Remember, every family’s needs are unique—choose what feels right for your adventures together!
4. Wiring, Fuses, and Circuit Protection
When it comes to wiring your self-build campervan in the UK, safety and compliance with local standards are essential. In this section, well guide you step-by-step through installing wiring, fuses, breakers, and consumer units using UK-standard materials and colour codes. This will give you peace of mind, knowing that your van is safe for all your family adventures.
Step 1: Planning Your Wiring Layout
Before laying any cable, draw a detailed diagram of your electrical system. Mark out where appliances will be located, routes for cables, and positions for fuses and breakers. This helps prevent mistakes later on and ensures each part of your campervan gets the power it needs.
Step 2: Choosing the Correct Cables
Use cables rated for automotive or leisure vehicle use, and always select the correct thickness (cross-sectional area) to handle the expected current. Follow UK wiring colour codes strictly:
| Function | Wire Colour (UK Standard) |
|---|---|
| 12V Positive (Battery) | Red or Brown |
| 12V Negative (Earth) | Black or Blue |
| 230V Live | Brown |
| 230V Neutral | Blue |
| 230V Earth | Green/Yellow Stripe |
Step 3: Installing Fuses and Breakers
Fuses and circuit breakers protect your wiring from damage if something goes wrong. Place a fuse as close to the battery or power source as possible for each major circuit. Each appliance or group of appliances should have its own appropriately rated fuse.
| Circuit Type | Recommended Fuse Rating (Amp) |
|---|---|
| LED Lighting | 5A |
| Water Pump | 10A |
| Sockets/USB Chargers | 15A-20A |
| Main Inverter Feed | According to inverter specs (usually 40A+) |
Circuit Protection Tips:
- Always match fuse size to cable capacity; never oversize fuses.
- If using a consumer unit for 230V systems, ensure it is certified for mobile/home use.
- A Residual Current Device (RCD) is mandatory for mains circuits in the UK; this protects against electric shock.
- Circuit breakers can reset after tripping, unlike fuses which need replacing.
Step 4: Safe Installation Practices
– Secure cables neatly using clips or conduit; avoid sharp bends and areas that may rub.
– Never run 12V and 230V wires together in the same conduit.
– Label both ends of every wire for easy troubleshooting later.
– Double-check connections for tightness before powering up.
A Family-Friendly Reminder:
If you’re ever unsure about any part of your campervans electrical installation, consult a qualified electrician familiar with UK caravan or motorhome standards. Safety first means more worry-free adventures with those you love!
5. Fitting and Testing Campervan Electricals
Now that your wiring is in place, it’s time to start installing the essentials: sockets, switches, lights, and appliances. This stage can feel a bit like bringing your campervan to life—each fitting adds a little more comfort and convenience for your family adventures across the UK.
Beginner-Friendly Tips for Installing Electrical Components
Start with the basics. When fitting sockets, choose UK-standard 13A models for mains hookup and 12V sockets for off-grid power. Mark out where you’d like them—think about where you’ll want to charge devices or plug in a kettle after a long walk. For switches and lights, plan for easy access; for example, install reading lights near beds and a main switch by the sliding door so you never fumble in the dark.
Safe Fitting Process
Always turn off your power supply before working on any electrics. Use a voltage tester to double-check there’s no live current. Secure fittings tightly using screws suitable for your panels, and never force wires into tight bends as this can damage insulation. Connect each wire according to colour codes: brown for live, blue for neutral, green/yellow for earth (for mains), and red/black or brown/blue (for 12V DC systems). If you’re ever unsure, don’t hesitate to seek advice from an experienced electrician or friendly vanlife community online.
Installing Appliances
For beginners, start with simple appliances like USB chargers or LED strip lights before moving onto things like fridges or heaters. Each appliance should have its own fuse as part of your distribution board. Label every circuit clearly—future you will thank present you when something needs fixing during a rainy Lake District evening!
Testing and Troubleshooting Your Circuits
Once everything is fitted, it’s time for testing—a crucial step for safety and peace of mind. Begin by checking each circuit with a multimeter to ensure correct voltage is reaching your sockets and appliances. Turn on each device one at a time and watch for any flickering lights or tripping fuses. If something isn’t working as expected, calmly retrace your steps: are all wires connected securely? Are fuses intact? Sometimes it’s just a loose connection or swapped wire colours.
Final Words of Encouragement
Remember, it’s normal to feel nervous the first time you power up your self-built system. Take things slowly and celebrate each small win—whether it’s getting the kettle to boil or seeing fairy lights twinkle overhead. With patience and care, you’ll soon have a cosy, safe haven ready for family memories wherever the UK roads may take you.
6. Staying Safe and Legal on British Roads
When you’re building your own campervan in the UK, keeping your electrical systems safe and legal isn’t just about ticking boxes—it’s about protecting your family and making every adventure worry-free. Let’s look at how you can confidently comply with UK regulations and best practices for a reliable setup that keeps everyone smiling, even on rainy British days.
Understanding UK Regulations for Campervan Electrics
In Britain, vehicle electrics are closely regulated to ensure safety on public roads. Your self-build must meet the standards set out by the DVLA, as well as the Road Vehicles (Construction and Use) Regulations. If your campervan includes 230V mains electrics, wiring should comply with BS 7671 (the IET Wiring Regulations), just like a regular home. Remember: using certified components and proper fuses is not only best practice, it’s essential for legal compliance.
The Importance of Certification
If you plan to have your campervan professionally converted or want extra peace of mind, consider having a qualified electrician inspect your system. An Electrical Installation Condition Report (EICR) or certificate for your 230V installation can be invaluable if you ever sell your van—or if you’re stopped for an inspection.
Top Tips for Family Safety
- Use only UK-approved sockets, plugs, and consumer units
- Fit Residual Current Devices (RCDs) to protect against electric shocks
- Label all switches clearly so even little helpers know what not to touch
Best Practices for Reliable Electrics on the Move
British weather is famously unpredictable—so waterproofing and secure connections are vital! Always use cable glands and grommets where wires pass through metal panels. Secure cables neatly to avoid wear and tear from vibrations, especially on bumpy country lanes. And don’t forget regular checks: make it a family habit to inspect fuses and connections before every trip.
Insurance and Peace of Mind
Many UK insurers require proof that electrical work was done safely—sometimes even by a professional. Keep all receipts, diagrams, and certificates together in a family folder so you’re ready if asked. This not only helps with insurance claims but ensures everyone feels secure when setting off for new adventures.
Your Family’s Confidence on Every Journey
Building your own campervan is a wonderful way to bond as a family—and following these essential guidelines will help keep you safe, legal, and ready for anything the Great British outdoors throws at you. Take pride in your careful work, knowing your adventures are powered by reliable electrics and plenty of good sense!